Cut step 1
Cut 2 roof pieces at 15 in.
A fun cedar fence picket project with a seed tray, a little water bowl shelf, and a simple rain-catching roof that helps direct drips where wildlife can use them.
This is one of those simple projects that feels extra fun because it does more than one thing at once. It gives birds, squirrels, and little critters a place to snack, a spot to drink, and a cute handmade look that fits right into a peaceful backyard.
We built this one from 2 cedar fence pickets, kept the process visual, and broke it into a natural build flow so you can follow along without needing a complicated plan set.

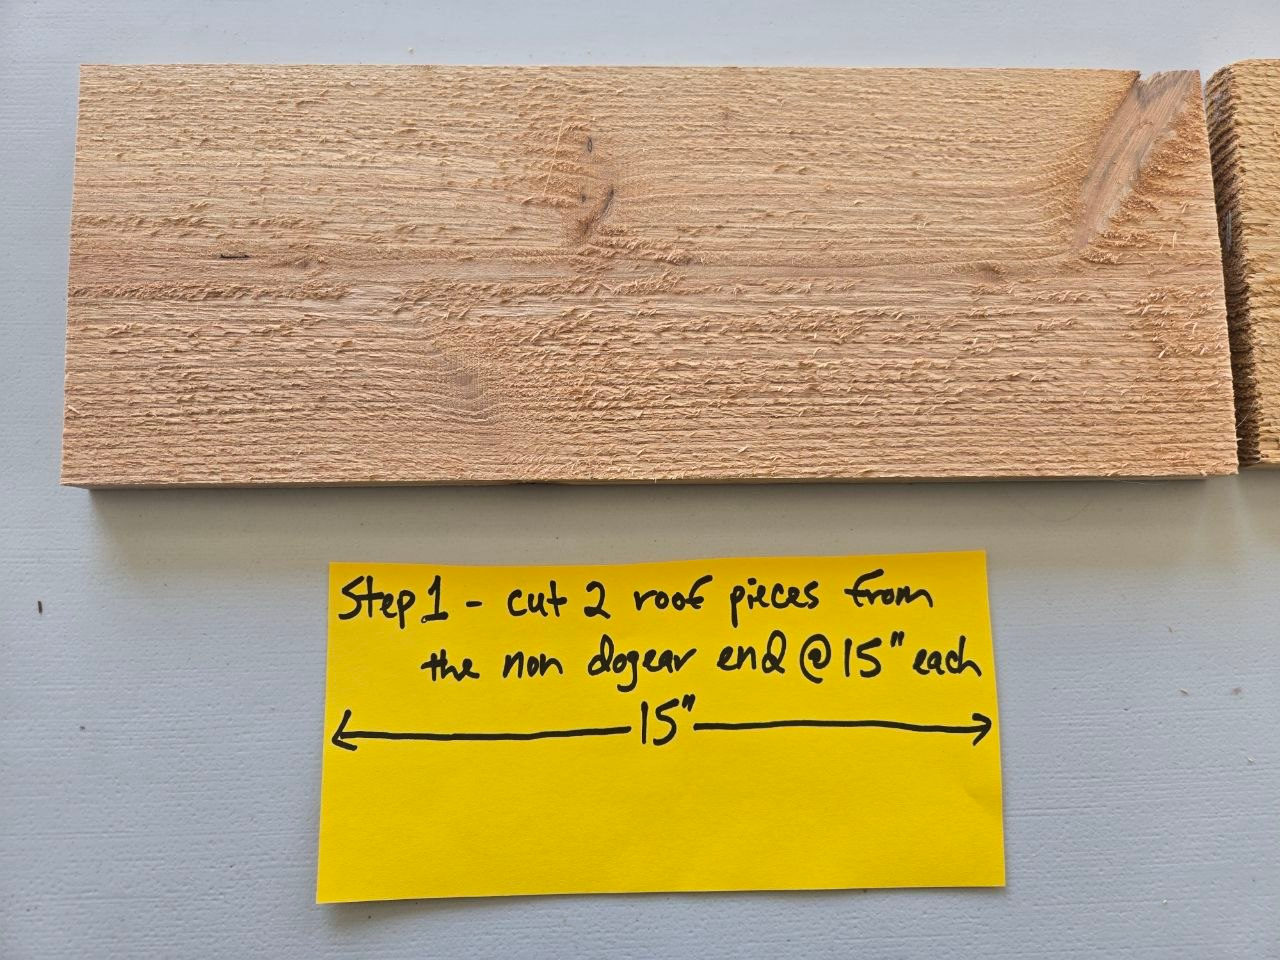
Cut 2 roof pieces at 15 in.
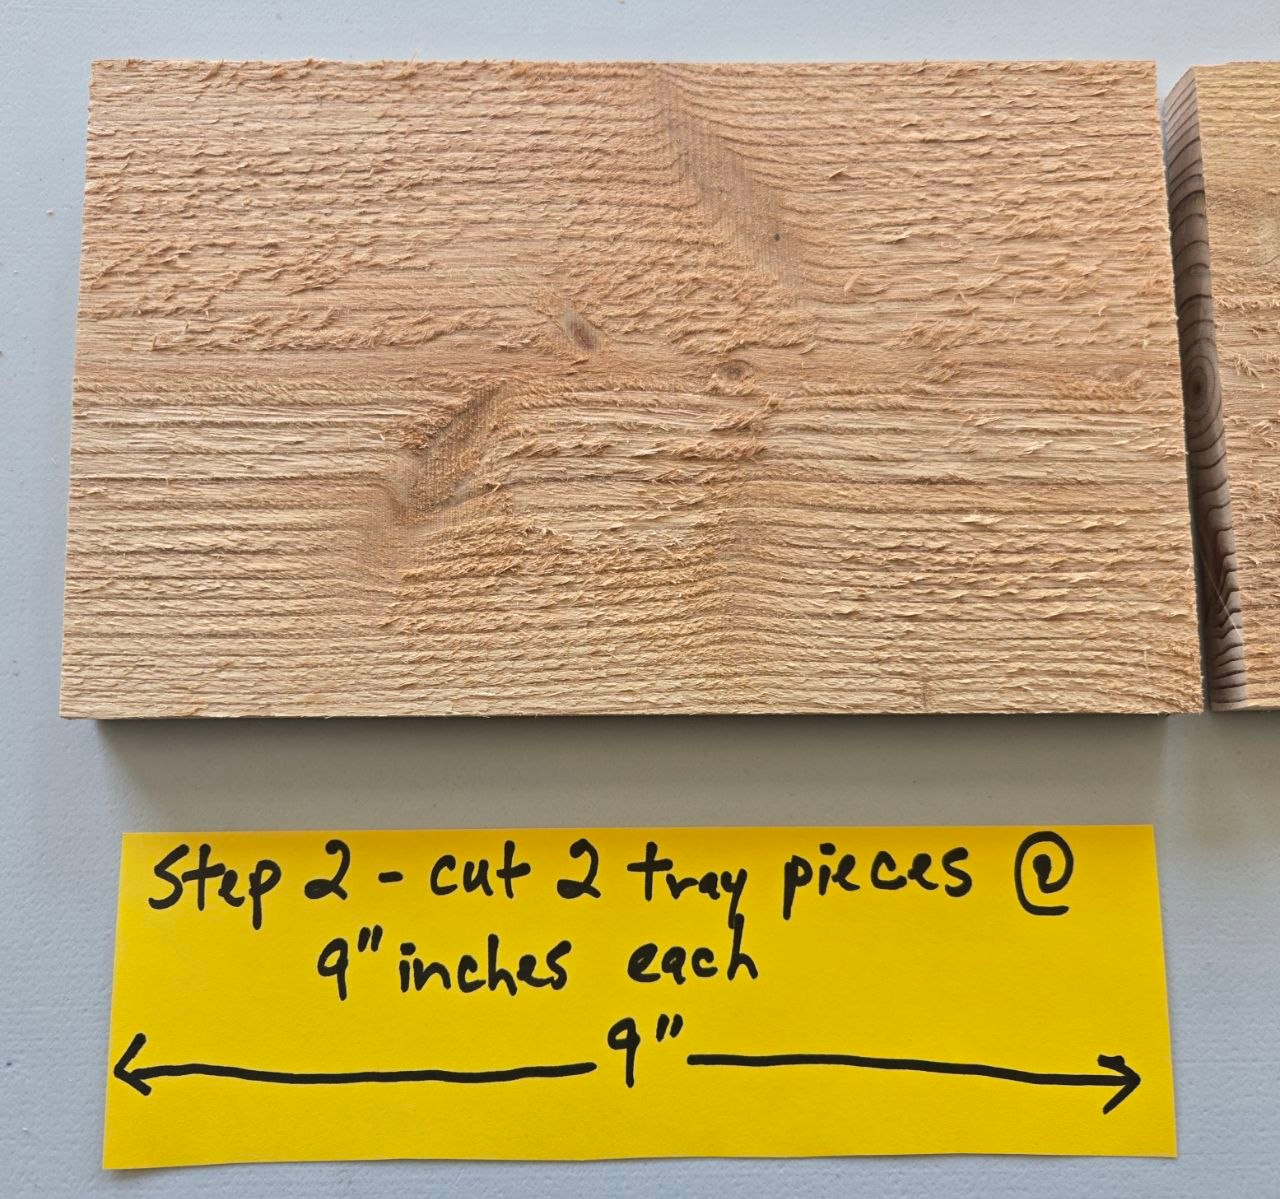
Cut 2 tray pieces at 9 in.
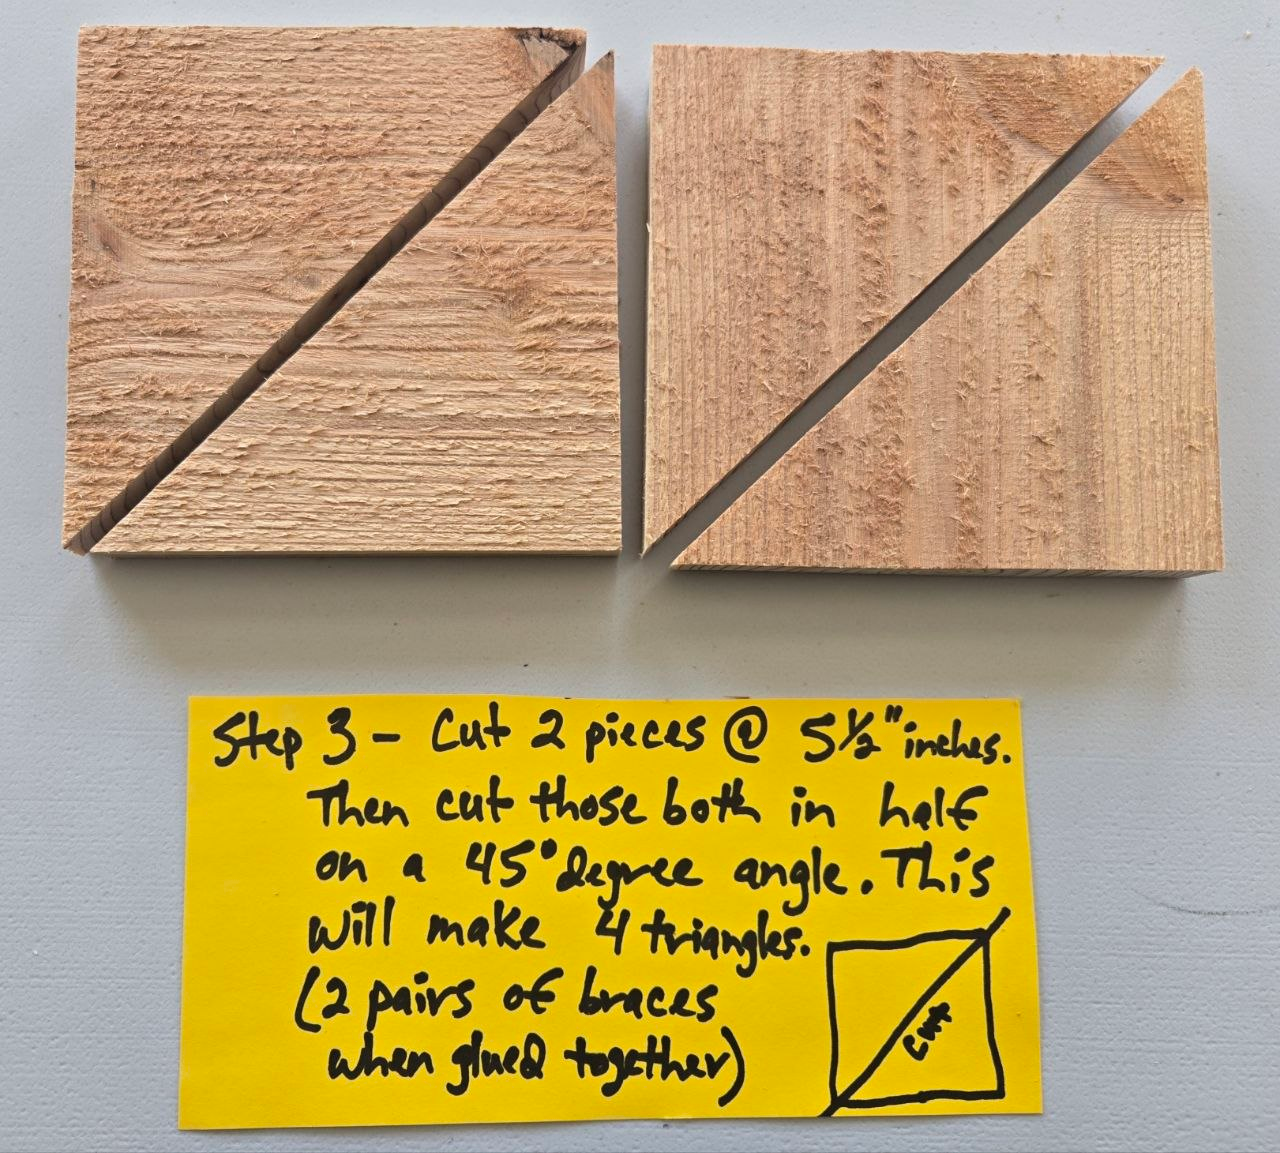
Cut 2 pieces at 5 1/2 in, then cut those on a 45° angle to make 4 triangles.
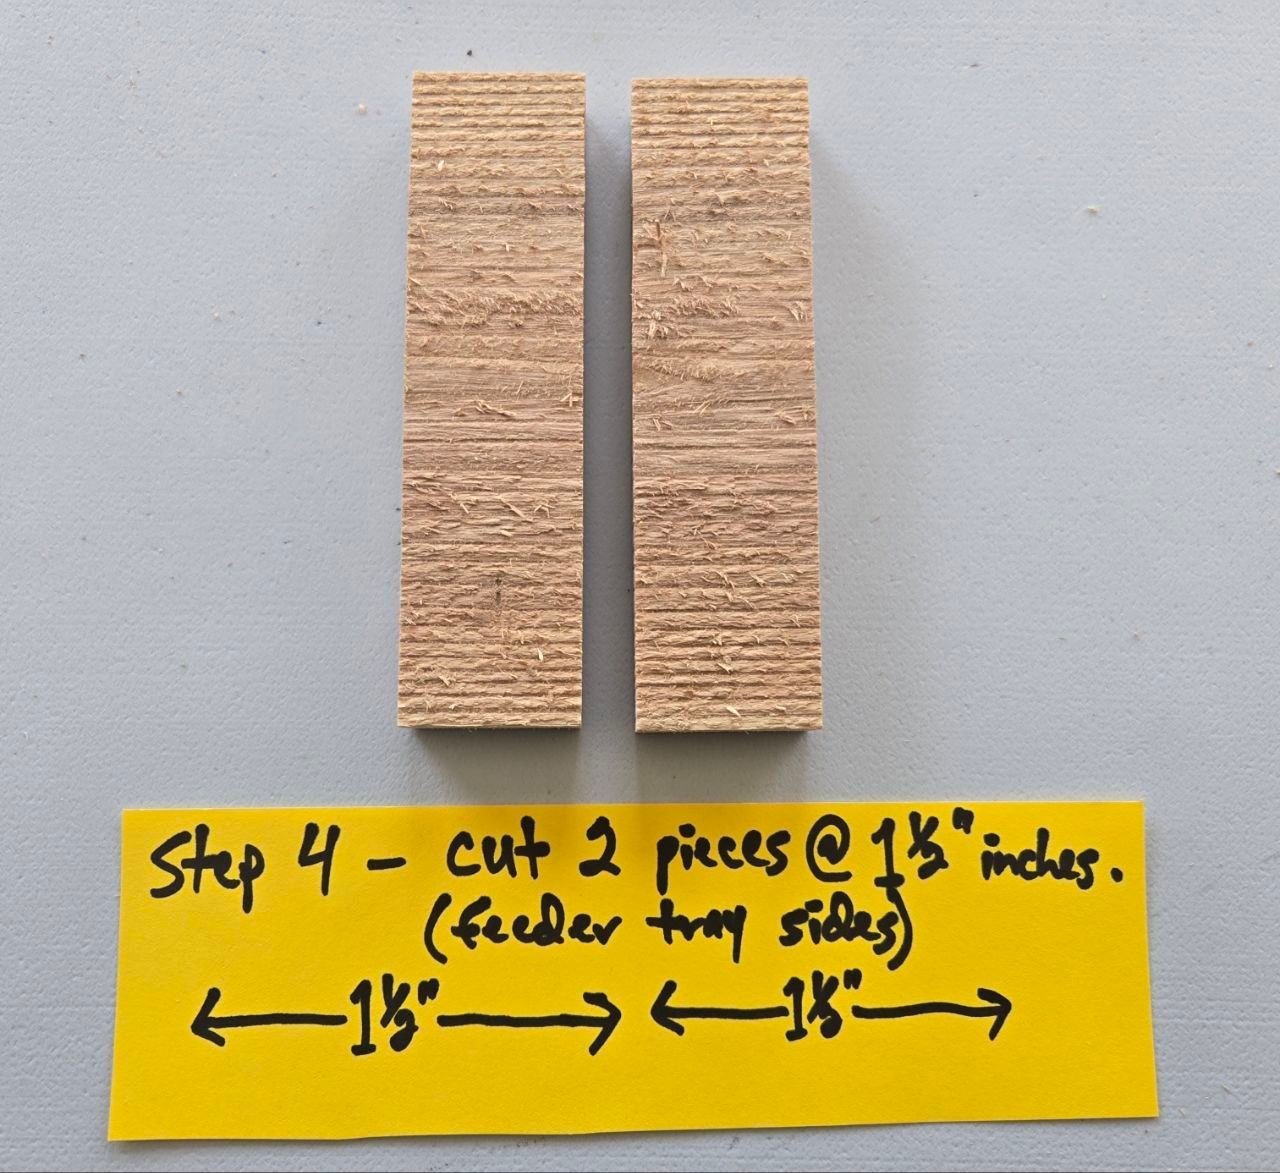
Cut 2 feeder tray side pieces at 1 1/2 in.
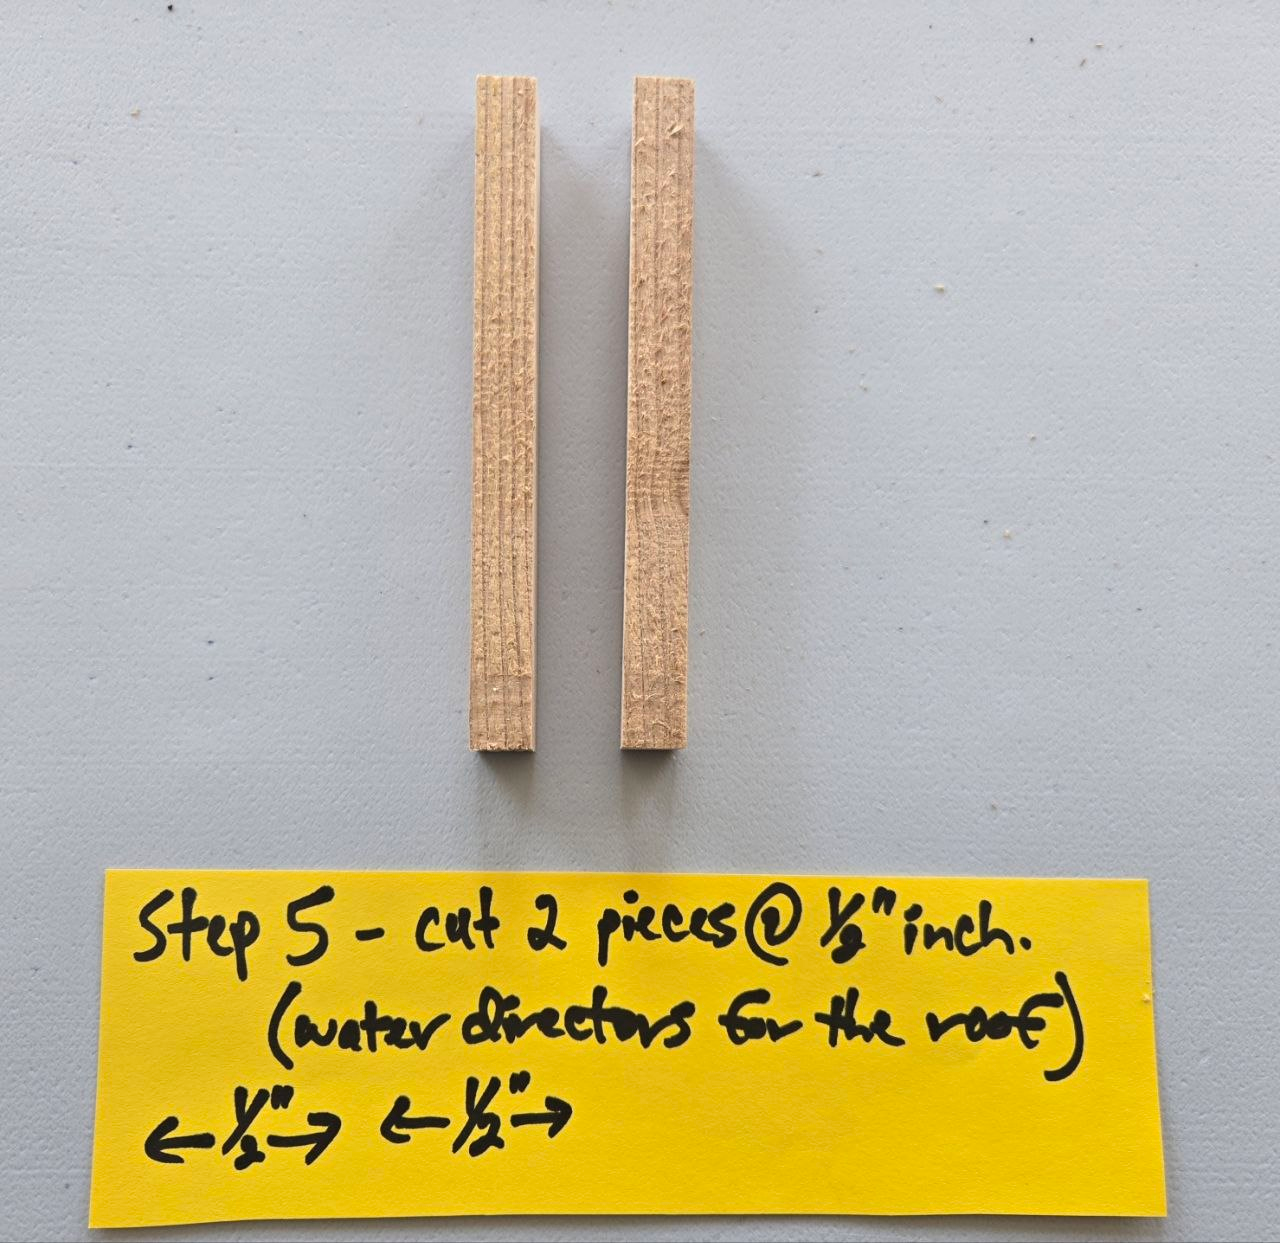
Cut 2 water directors for the roof at 1/2 in.
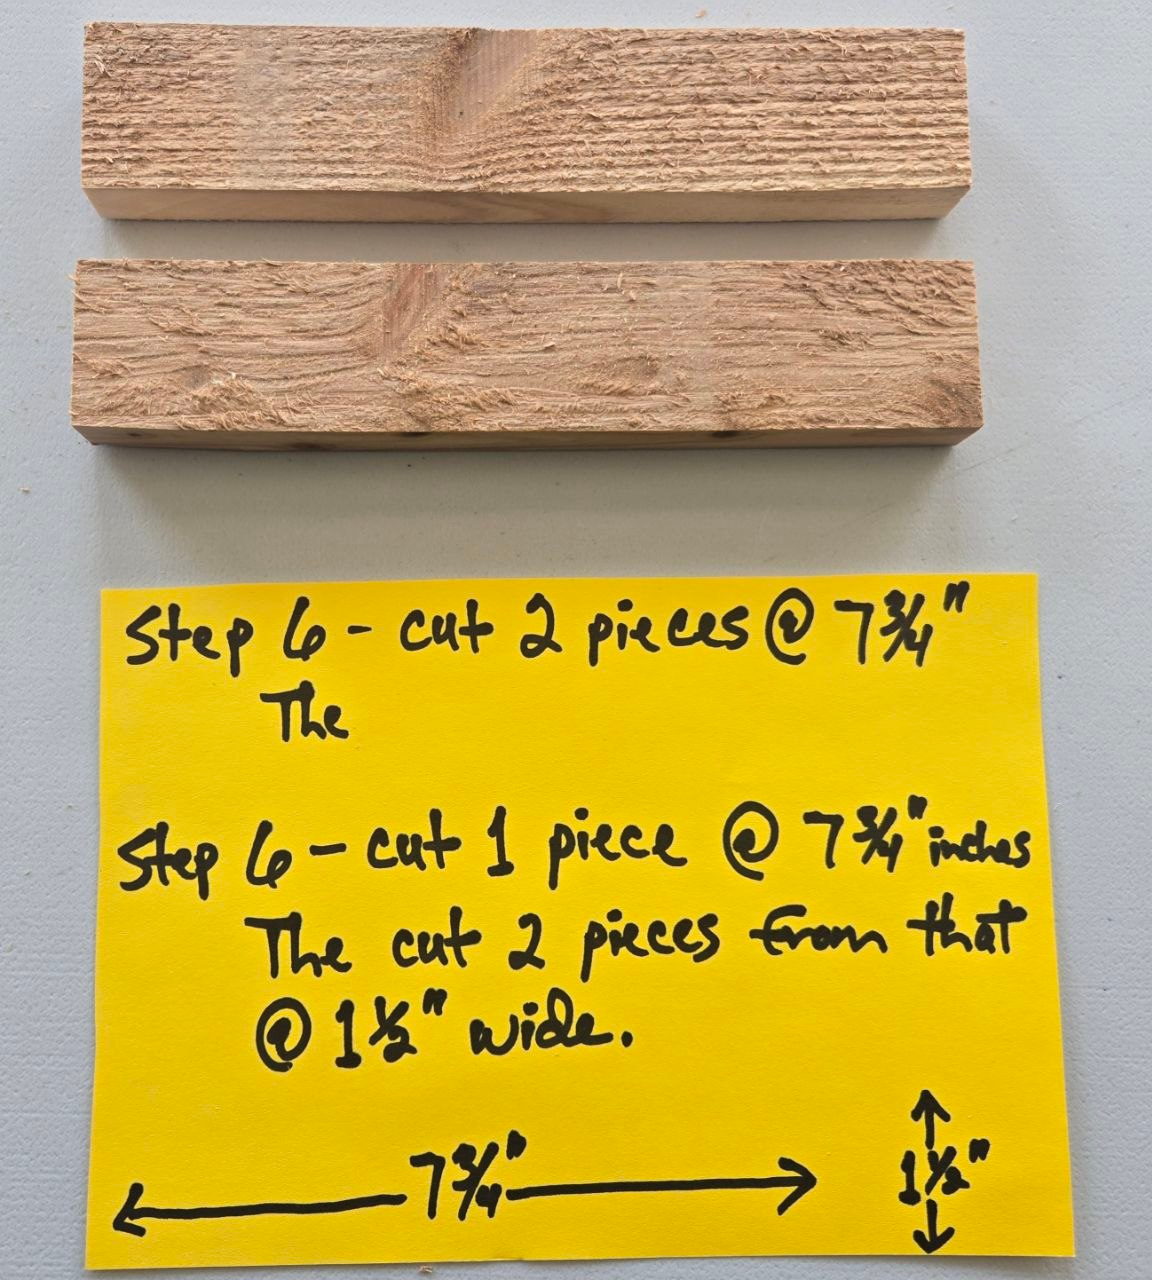
Cut 2 pieces at 7 3/4 in, then make the extra 1 1/2 in wide support pieces from the last section.

Rip the second cedar fence picket in half lengthwise.
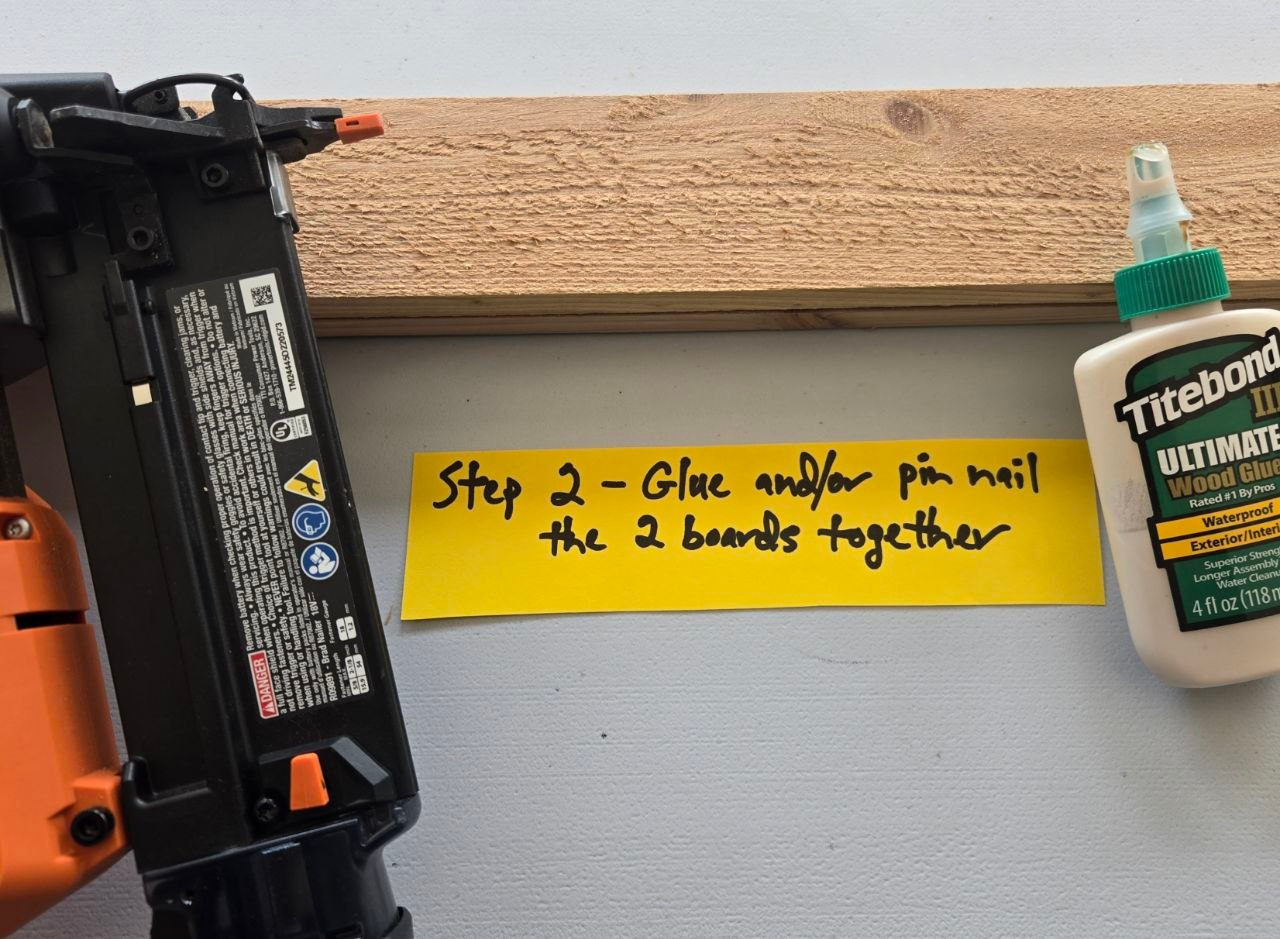
Glue and/or pin nail the 2 halves together.
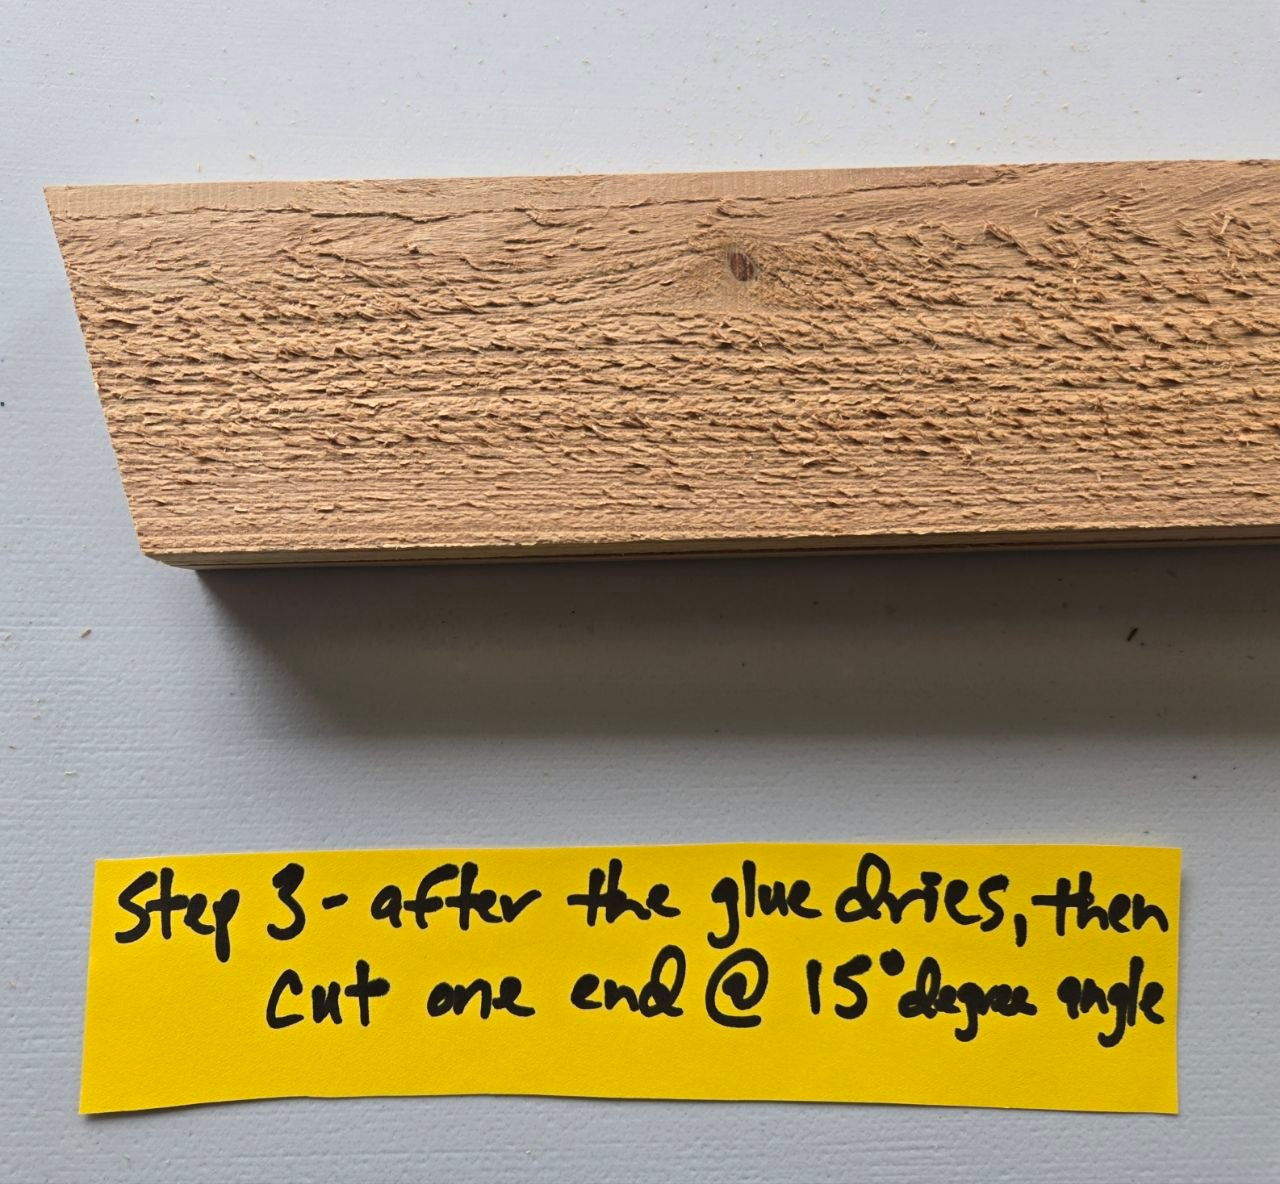
After the glue dries, cut one end at a 15° angle.
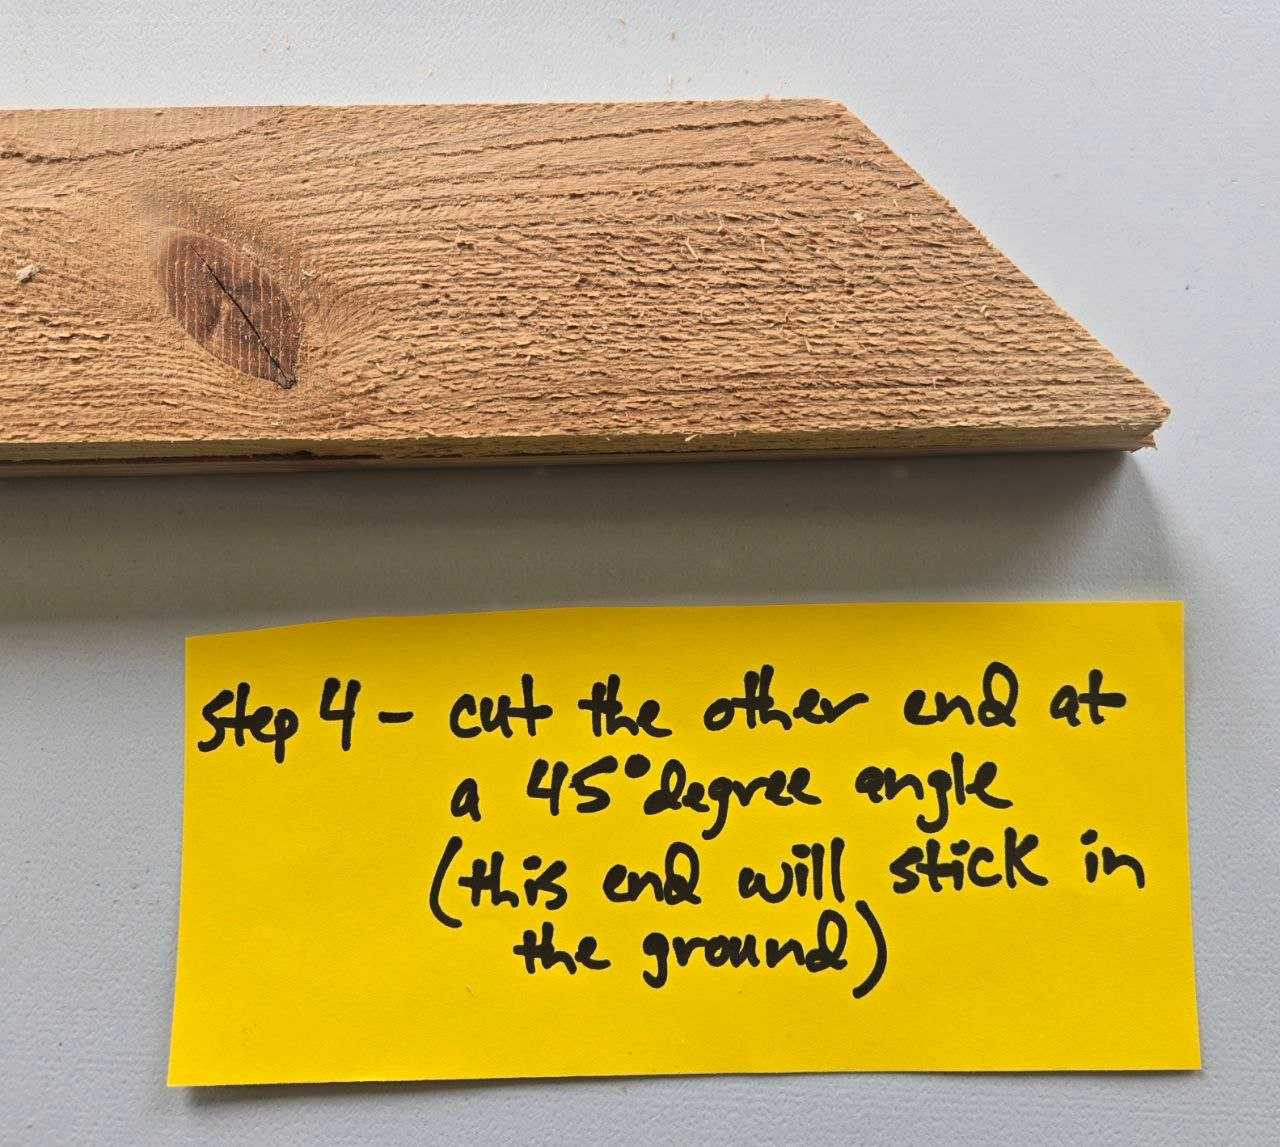
Cut the other end at a 45° angle for the ground end.
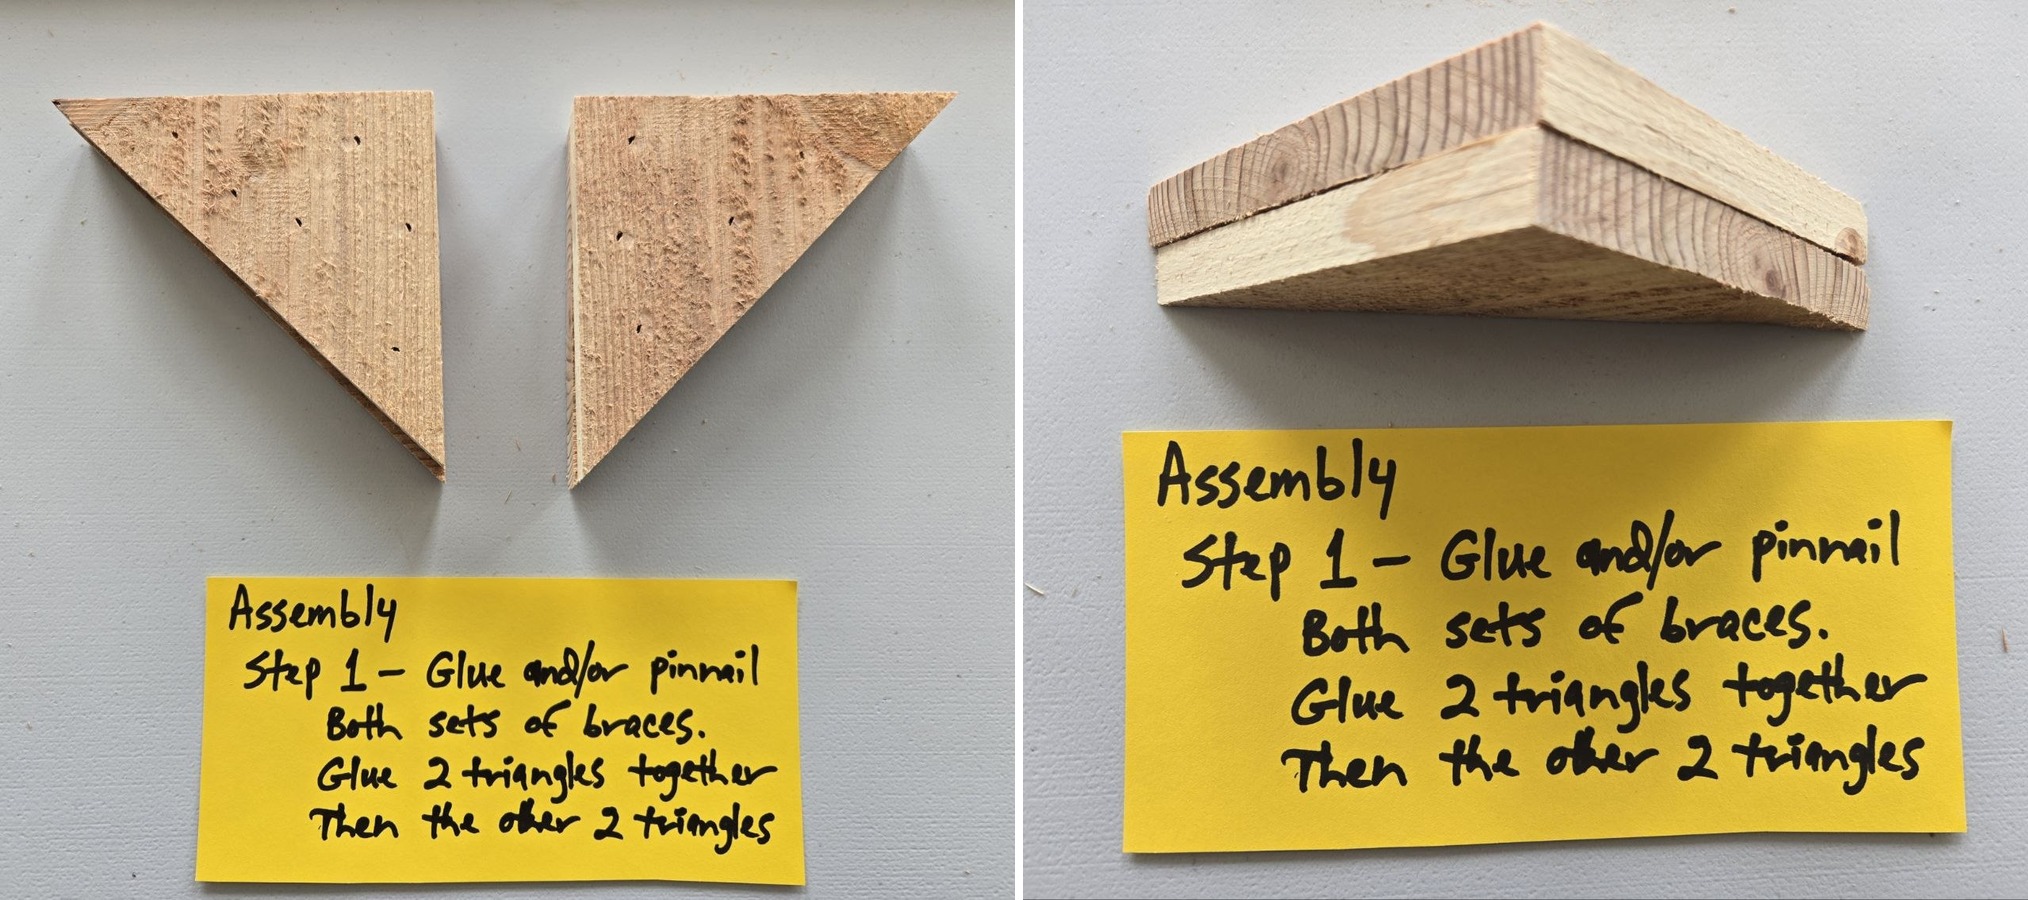
Glue and pin both brace sets together so the support pieces are ready before the trays go on.
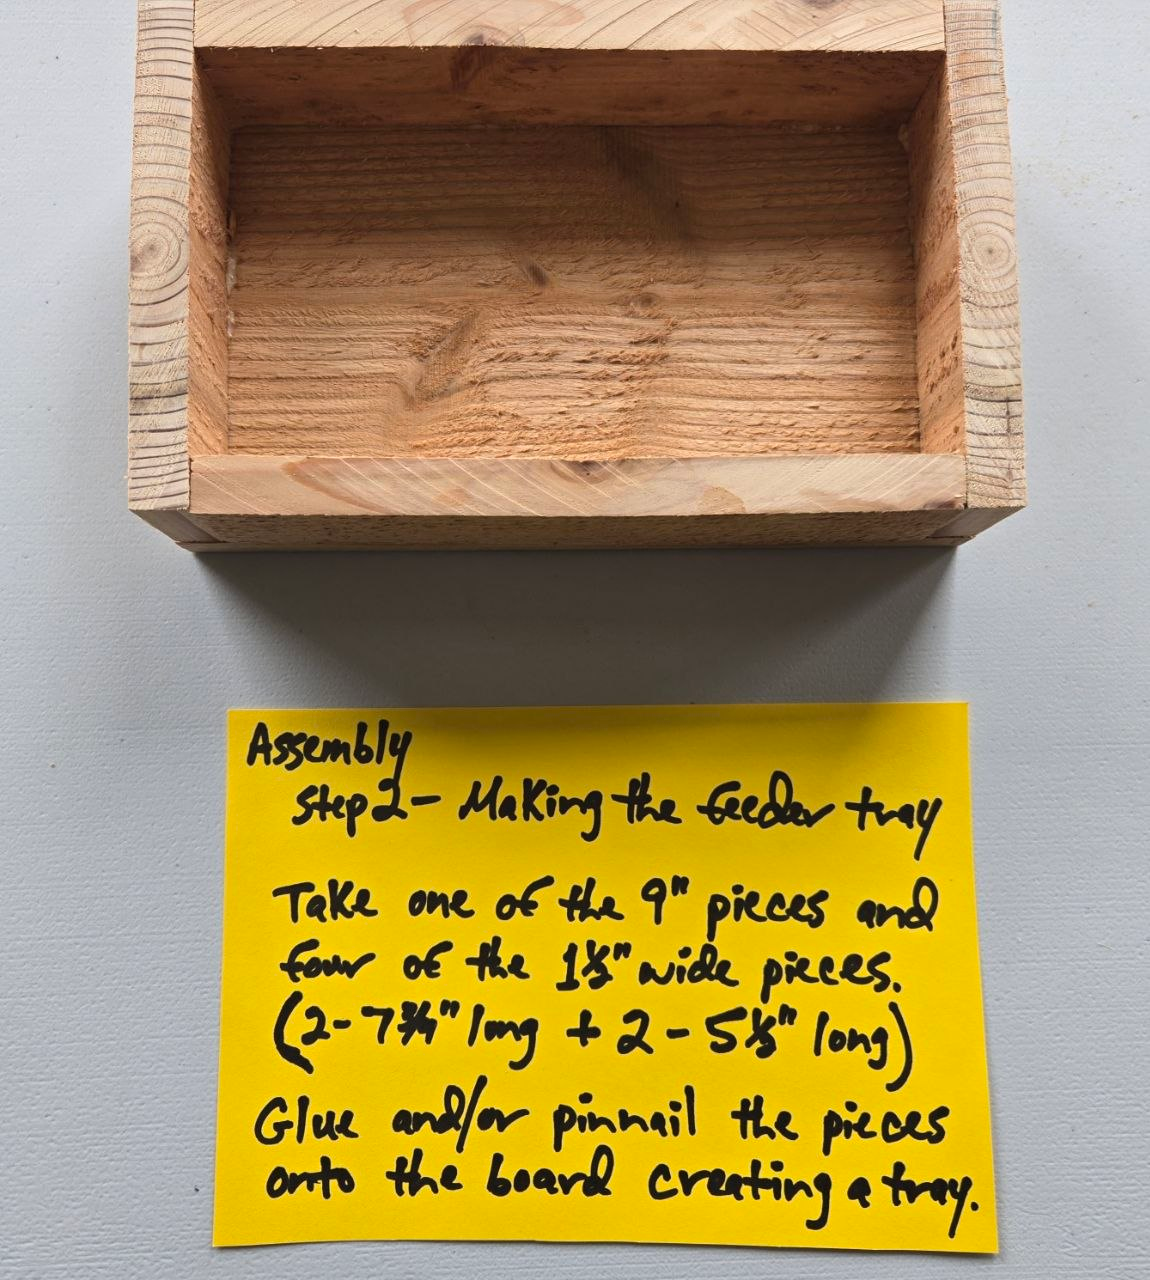
Build the feeder tray and get the little side walls in place.

Glue the roof boards together and hold them in place while they dry.
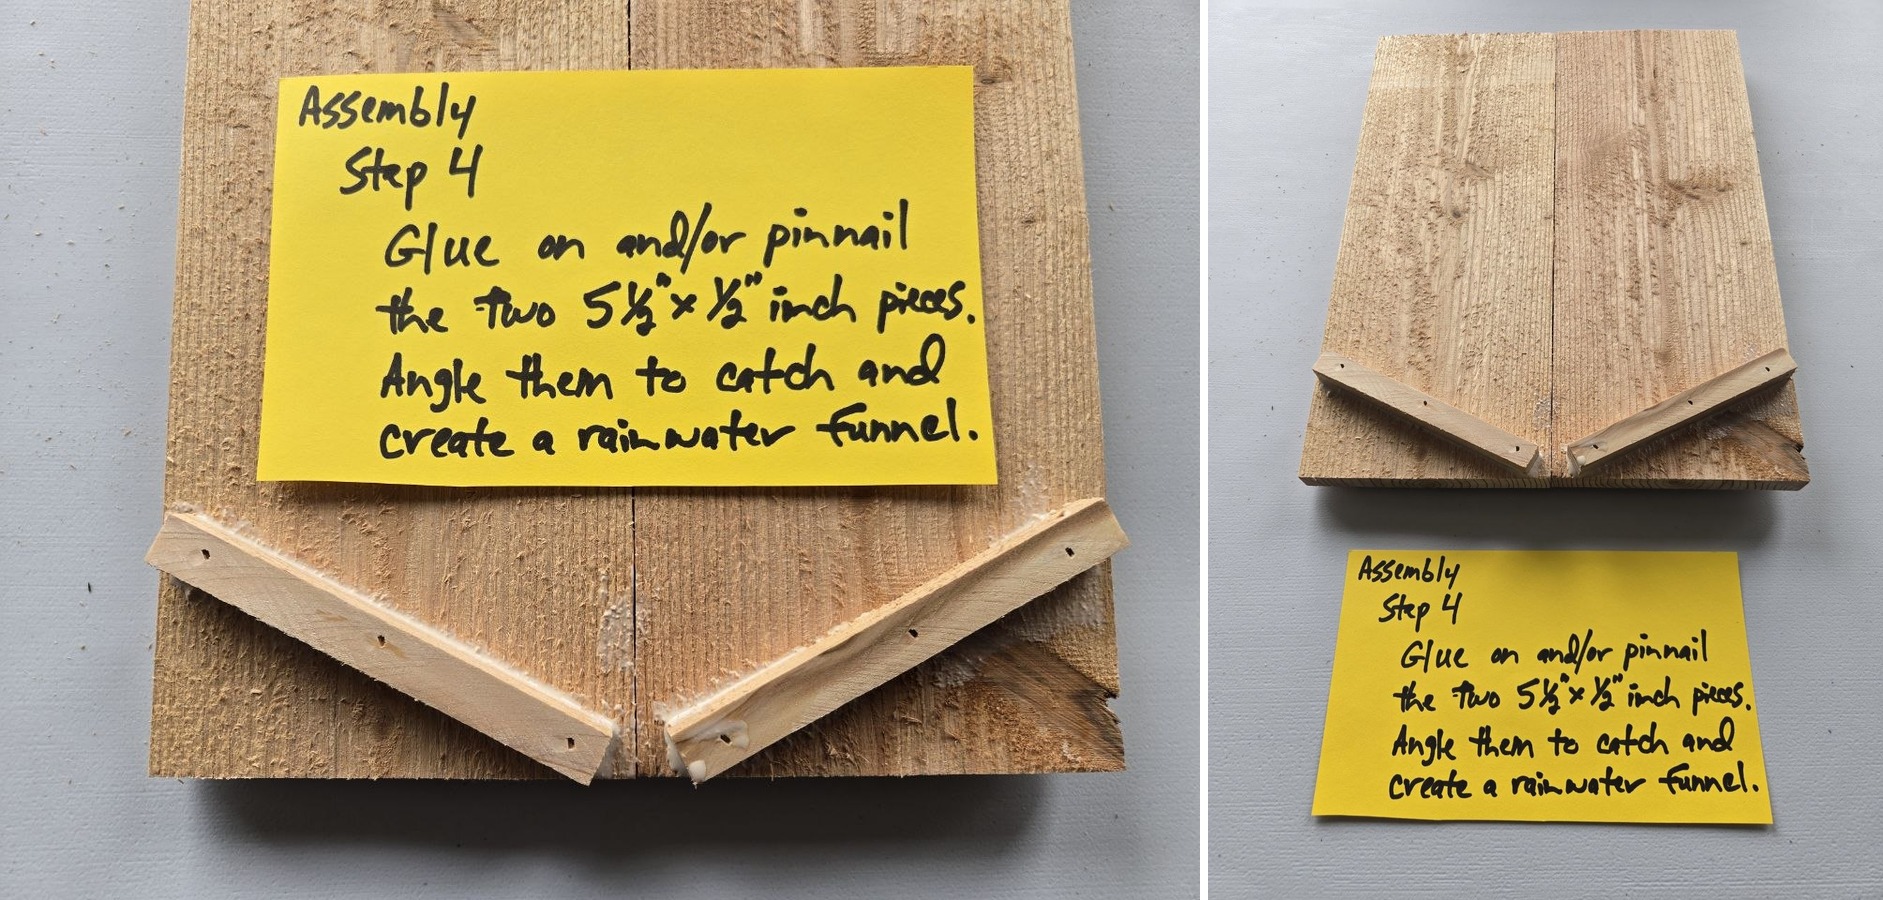
Add the little water-director strips so rain can be guided toward the bowl side.
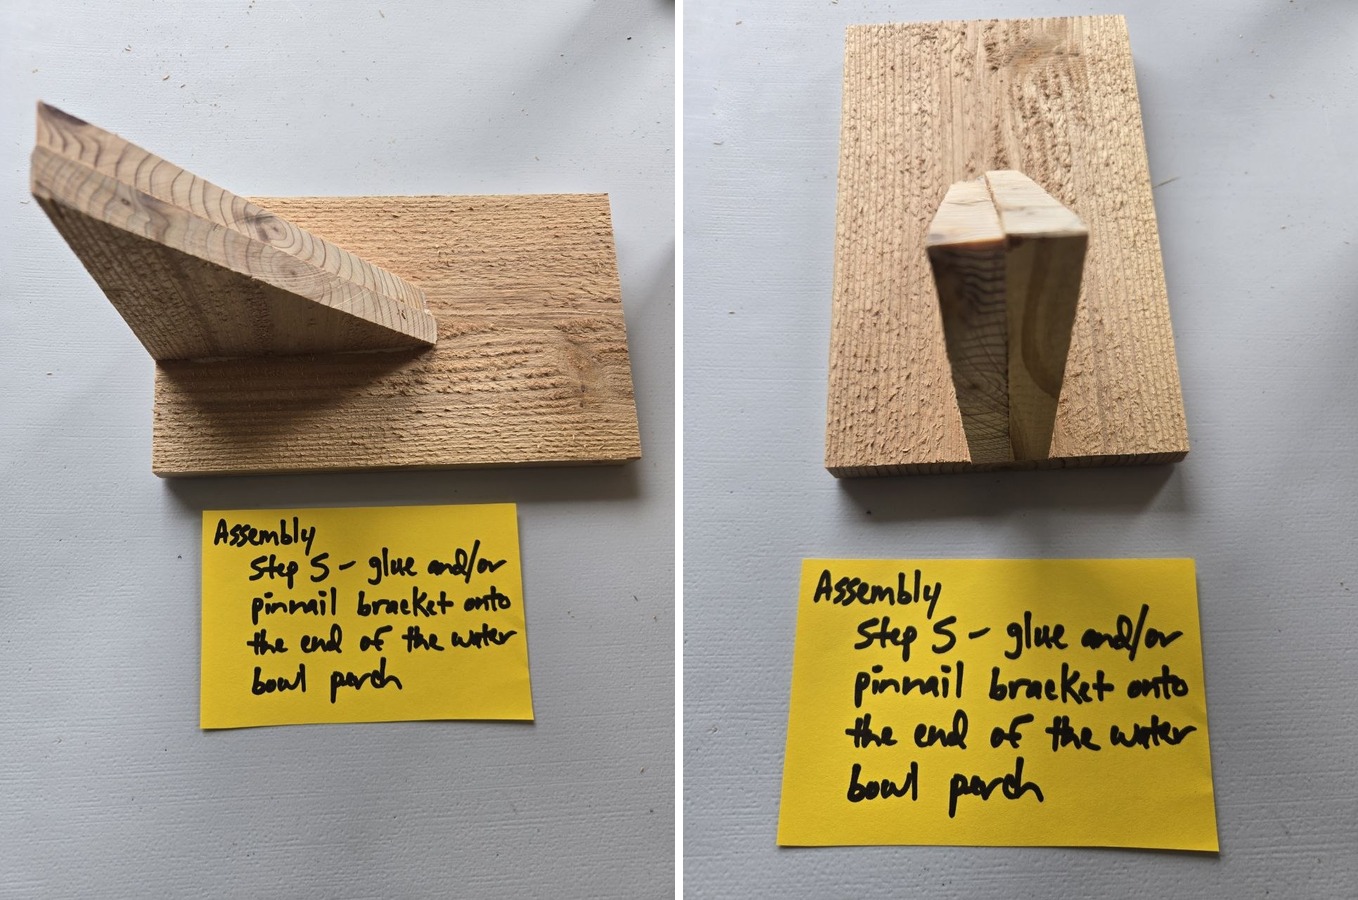
Attach the bracket support to the water bowl perch.
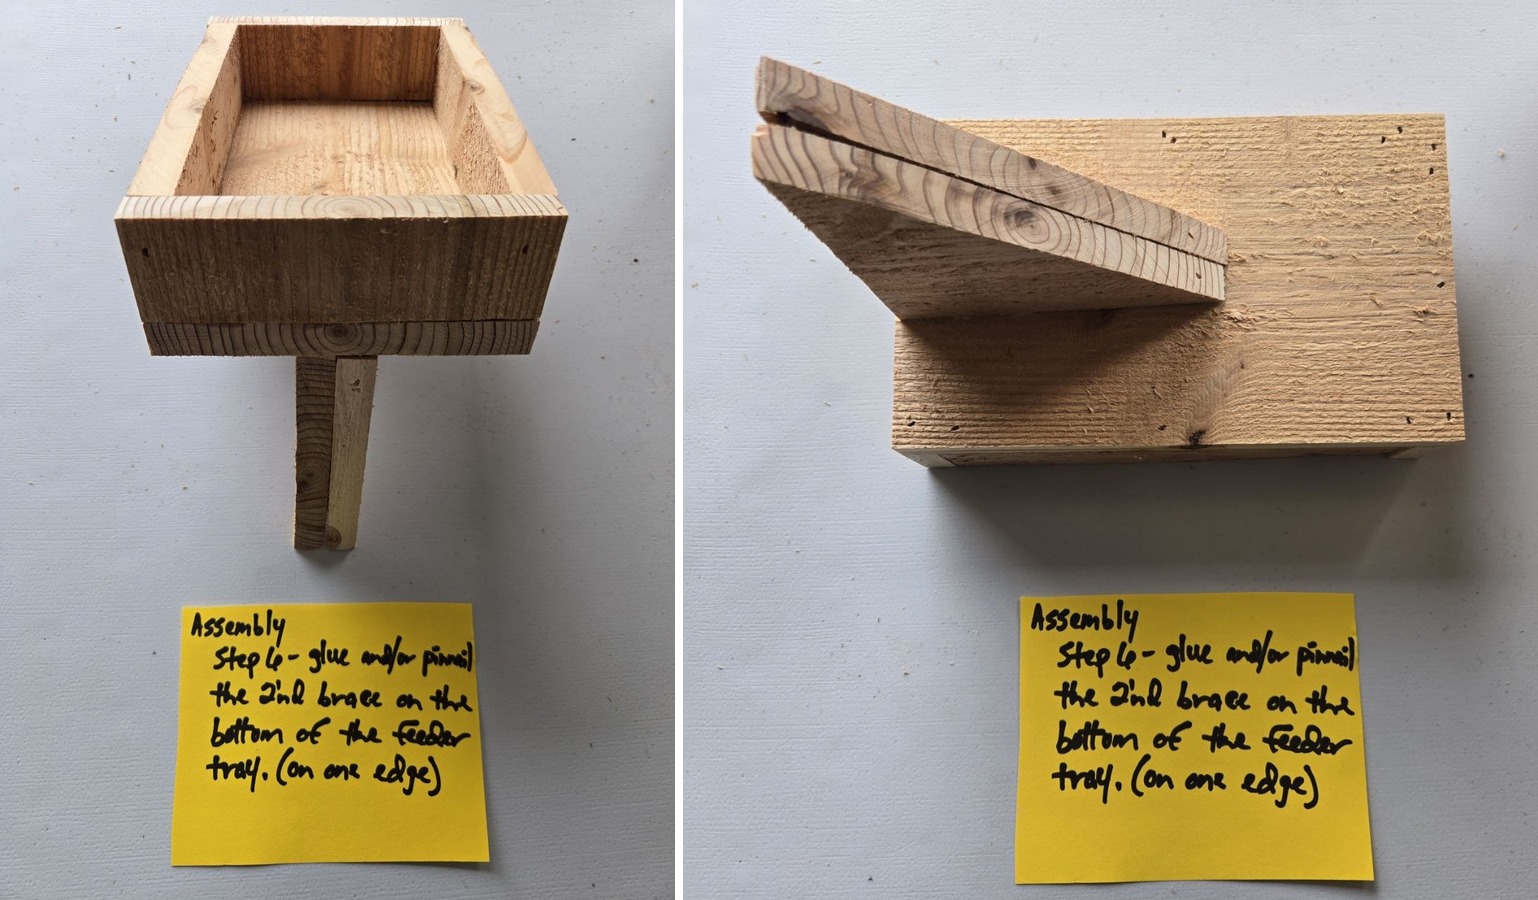
Add the second brace under the feeder tray for extra strength.
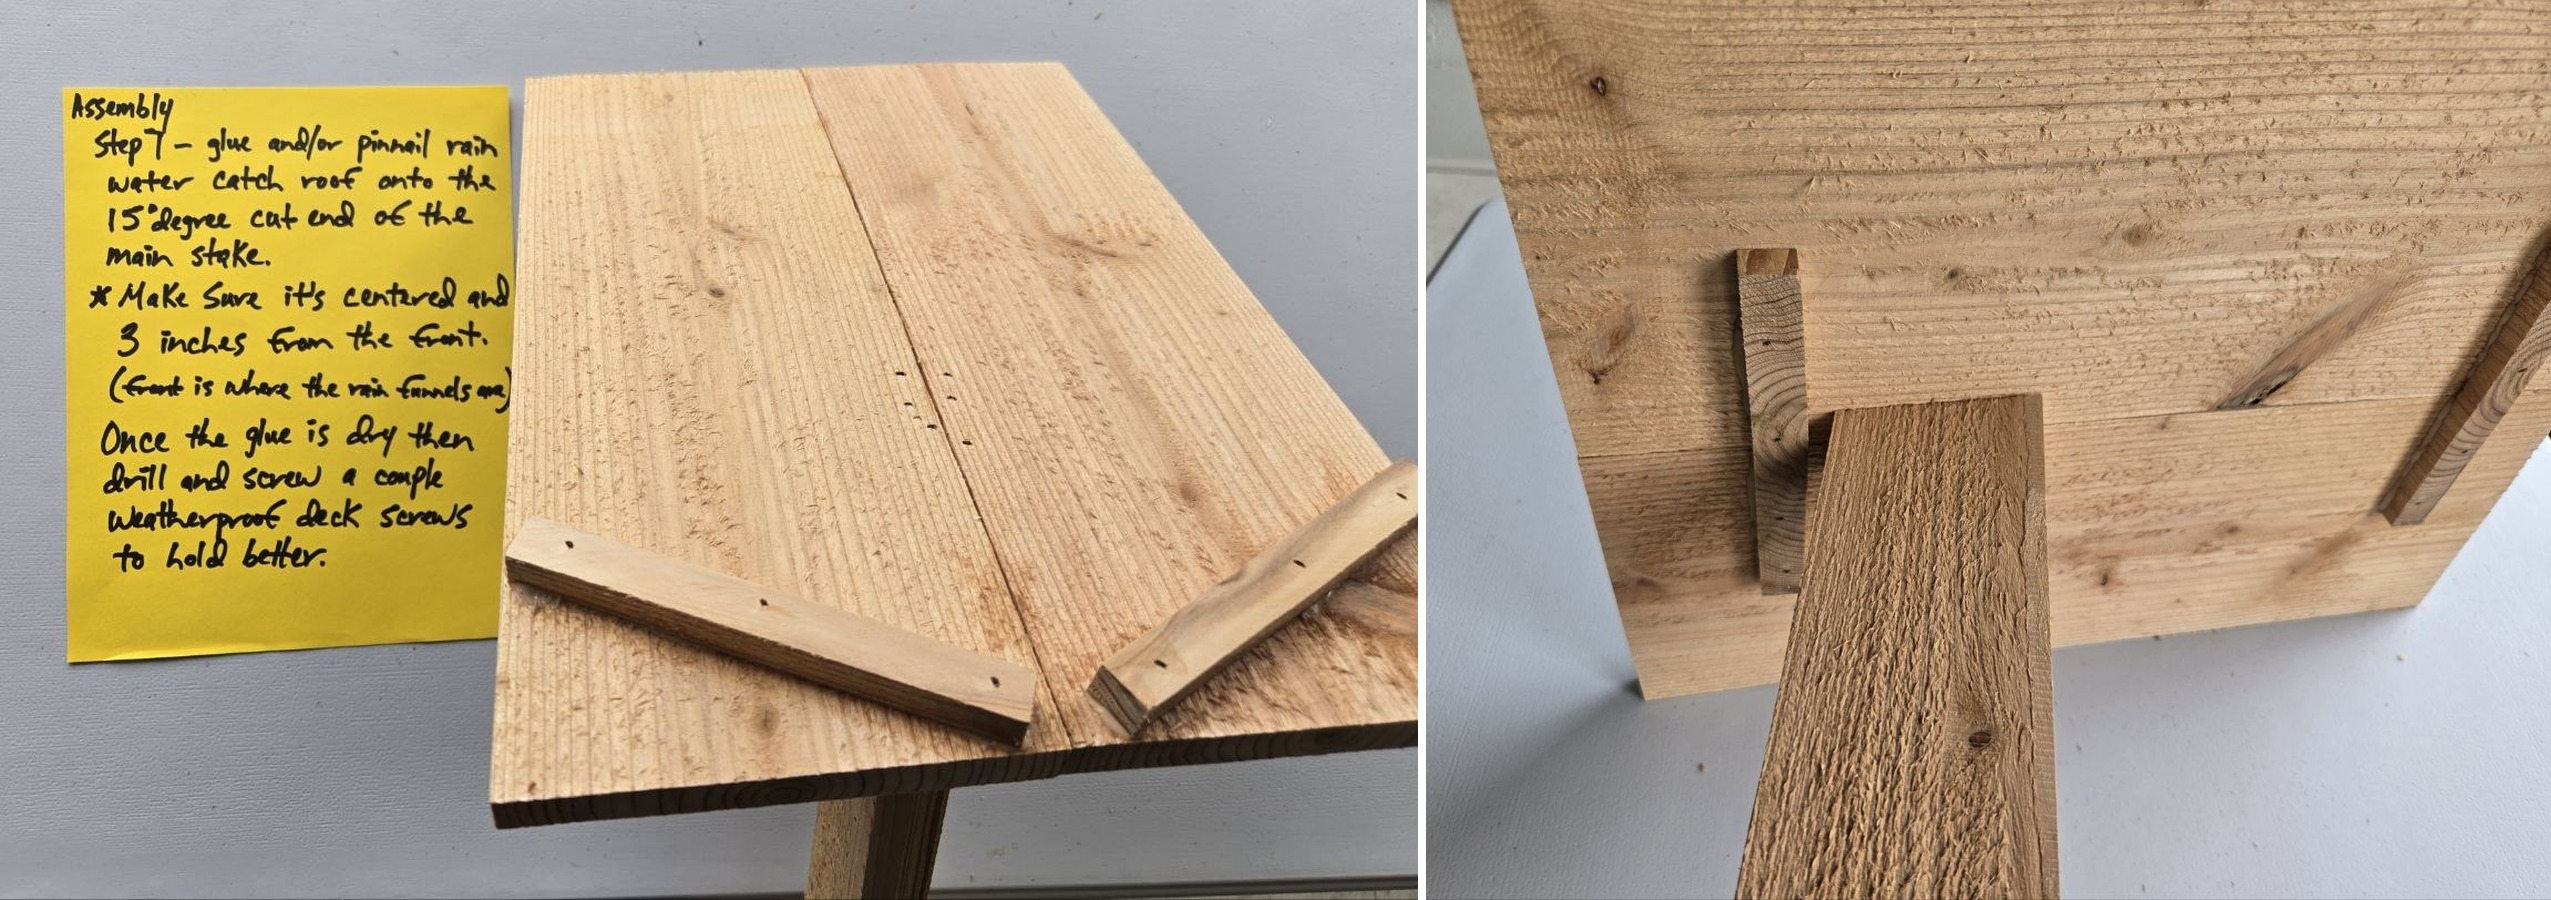
Mount the roof onto the angled top of the main stake and center it carefully.
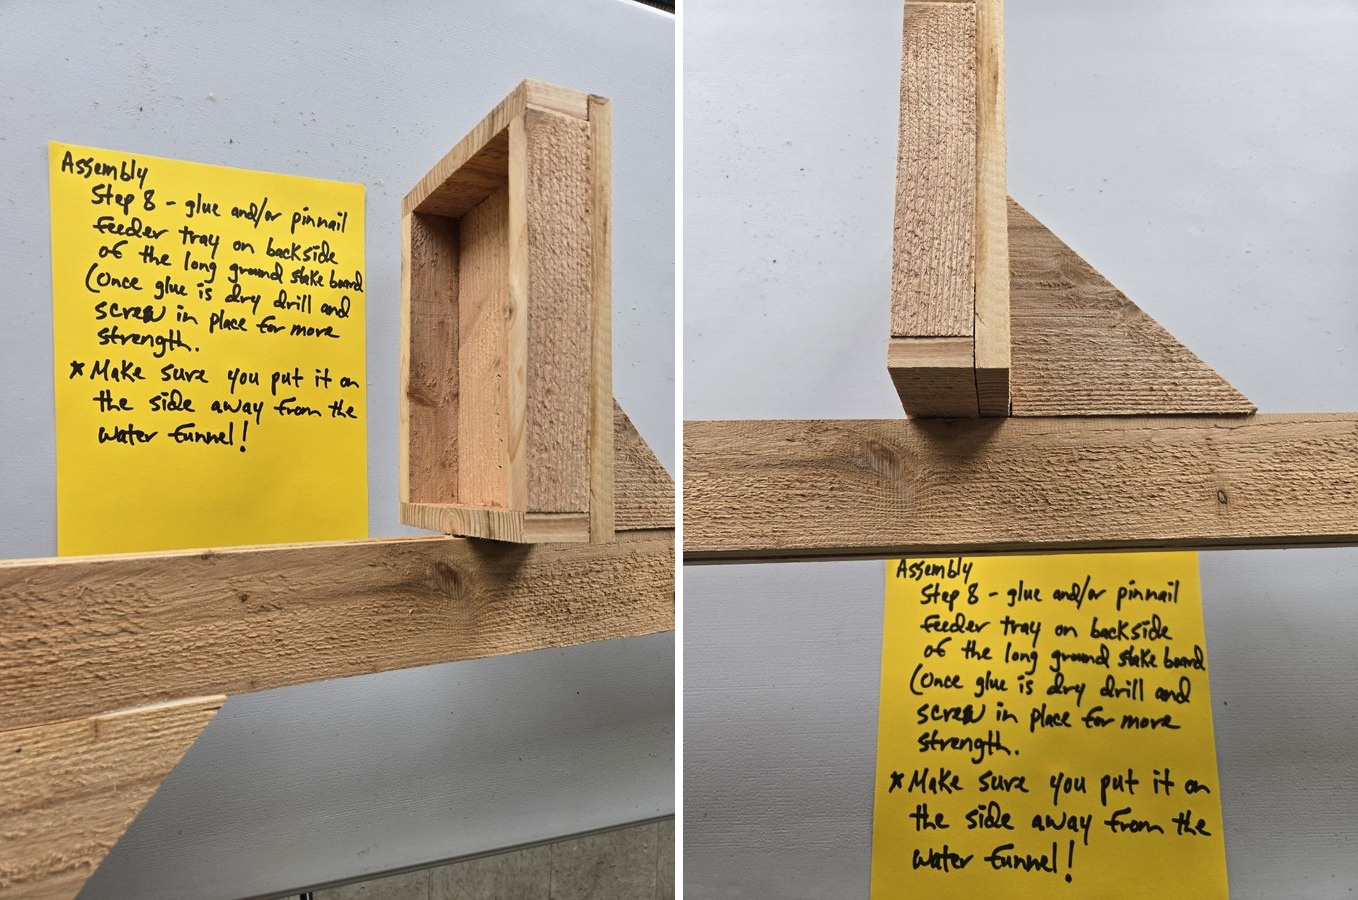
Attach the feeder tray to the back side of the long ground stake.
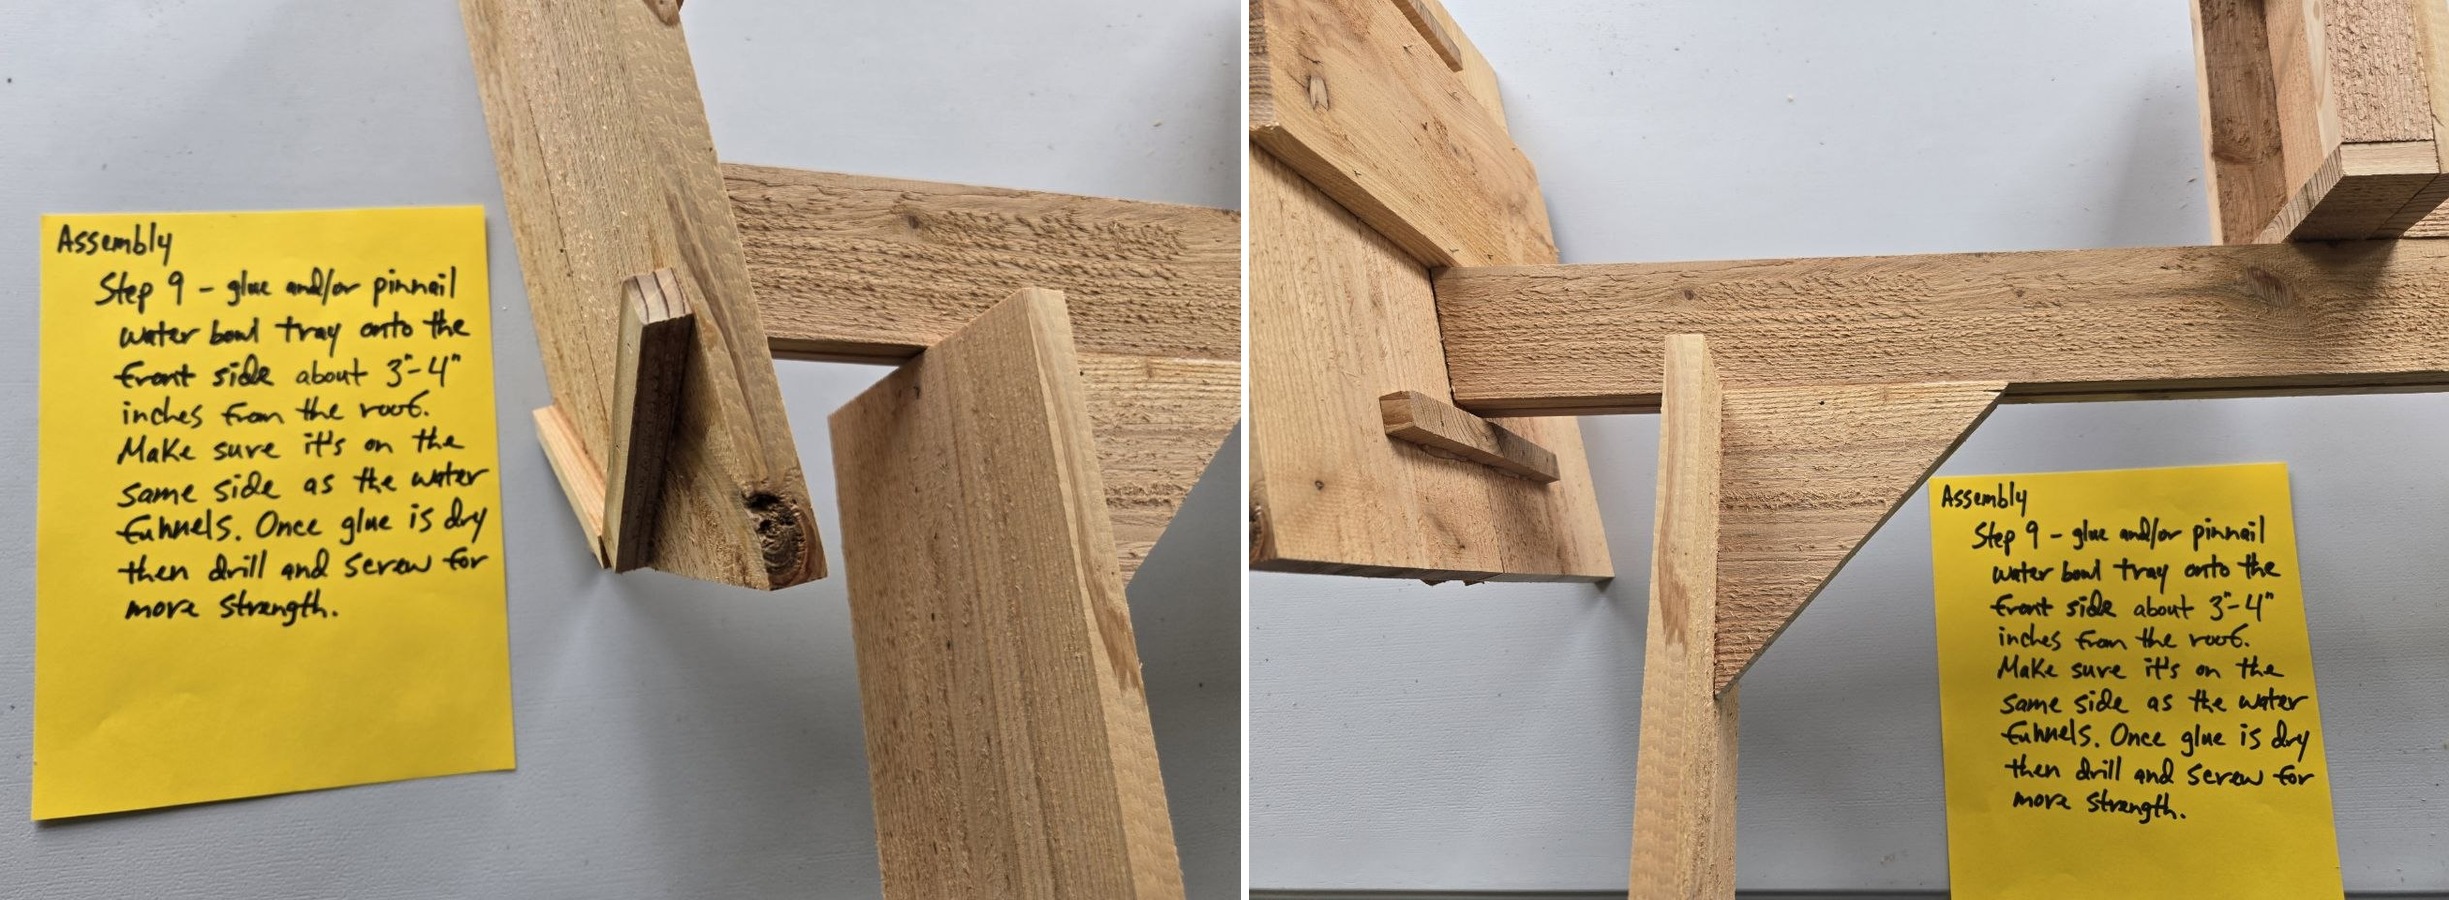
Attach the water bowl tray on the front side, under the roof and water funnels.
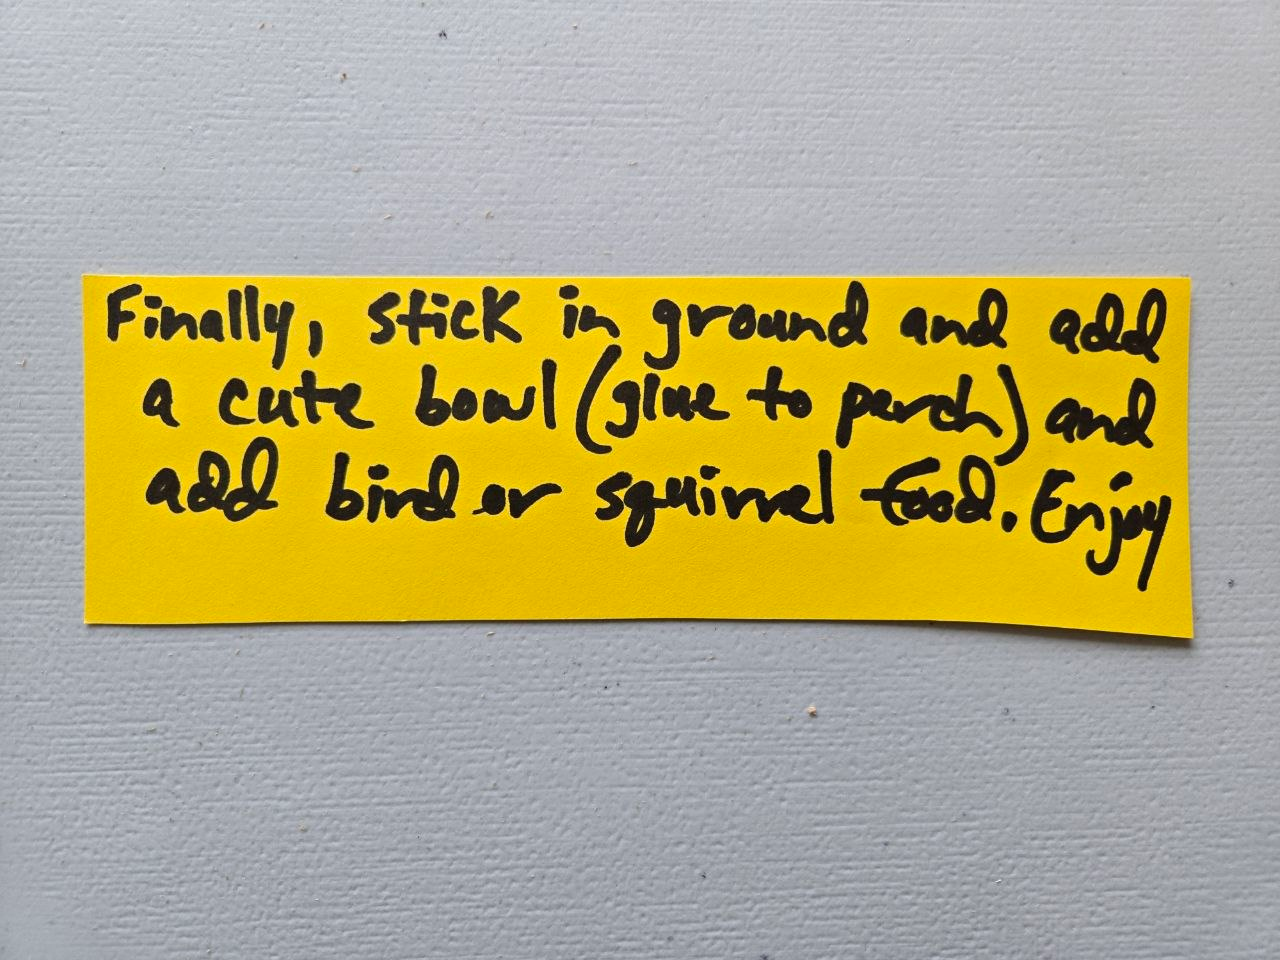
Set it in the ground, add the bowl, add some food, and enjoy the finished station.